
This site uses cookies. By continuing to browse the site, you are agreeing to our use of cookies. See our Privacy policy.
OKWe may request cookies to be set on your device. We use cookies to let us know when you visit our websites, how you interact with us, to enrich your user experience, and to customize your relationship with our website.
Click on the different category headings to find out more. You can also change some of your preferences. Note that blocking some types of cookies may impact your experience on our websites and the services we are able to offer.
These cookies are strictly necessary to provide you with services available through our website and to use some of its features.
Because these cookies are strictly necessary to deliver the website, refusing them will have impact how our site functions. You always can block or delete cookies by changing your browser settings and force blocking all cookies on this website. But this will always prompt you to accept/refuse cookies when revisiting our site.
We fully respect if you want to refuse cookies but to avoid asking you again and again kindly allow us to store a cookie for that. You are free to opt out any time or opt in for other cookies to get a better experience. If you refuse cookies we will remove all set cookies in our domain.
We provide you with a list of stored cookies on your computer in our domain so you can check what we stored. Due to security reasons we are not able to show or modify cookies from other domains. You can check these in your browser security settings.
These cookies collect information that is used either in aggregate form to help us understand how our website is being used or how effective our marketing campaigns are, or to help us customize our website and application for you in order to enhance your experience.
If you do not want that we track your visit to our site you can disable tracking in your browser here:
We also use different external services like Google Webfonts, Google Maps, and external Video providers. Since these providers may collect personal data like your IP address we allow you to block them here. Please be aware that this might heavily reduce the functionality and appearance of our site. Changes will take effect once you reload the page.
Google Webfont Settings:
Google Map Settings:
Google reCaptcha Settings:
Vimeo and Youtube video embeds:
The following cookies are also needed - You can choose if you want to allow them:
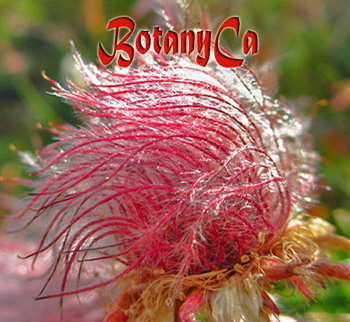
Out in the woods – Hepatica americana
Propagation…for admiring the second North American native Hepatica: Hepatica americana.
Again, even if there is a whole page dedicated to the Queen of the woodlands on the website and other images with these beauties, this is a celebratory period worth noticing.
In various shades of blue, white, sometimes purple and rarely pink, these little woodland wildflowers of spring are amongst the loveliest plants to be encountered when walking into the forest.
The only problem in April is to find a nice, sunny day when the flowers open (they remain close on rainy and cold days).
The pollination is preponderantly done by wind, although sometime early insects are tricked by the beautiful flowers on sunny days and accidentally may carry pollen to other flowers nearby (the flowers do not have nectar).
I have included on purpose an image where Hepatica americana among Gaultheria procumbens, also Chimaphila umbellata nearby, to emphasize that this species require a slightly acidic substrate for growing well.
Hepatica americana 2024-1
Hepatica americana 2024-2
Hepatica americana 2024-9
Hepatica americana 2024-3
Hepatica americana 2024-5
Hepatica americana 2024-4
Hepatica americana 2024-7
Hepatica americana ‘Apple Blossoms’
Hepatica americana 2024-8
Take a few minutes to read about Hepatica in general, and think about growing a few of these spring beauties in your garden, before fresh seeds become available (somewhere in late May-June).
The flower color may change in intensity from buds to the open flowers, and usually is more vivid in colder springs. This is a Hepatica color chart I’ve done one year to make sure we all speak the same ‘color language’ when talking about Hepatica americana and Hepatica acutiloba flower colors ;)
Out in the woods – spring beauties
Wildflowers of North AmericaBack to the ‘Out in the woods’ posts, with less ‘talk’ and more pictures. But make no mistake there is plenty info on this website to keep you reading about the featured plants.
Hepatica acutiloba fo. rosea
A bit earlier this year, the flowering of Hepatica acutiloba (Sharp lobed-leaf liverwort) has started in the southern regions of Ontario, along with its usual companions. Even if there are many images already on the website, it is an event that needs celebrating.
Depending on the amount of sun the plants get and the weather in the next week, more flowers will gradually open. In my garden, on shaded spots, some plants are still in bud.
For those new to the blog, you can read and see more pictures about Hepatica acutiloba, in general, and Hepatica acutiloba pastel mix in particular – from which seeds are offered almost every year.
There is also the Hepatica page, a FAQ regarding the moist packed seeds, and the Search tab where typing a couple of words will bring to ‘front’ other postings on that particular subject.
Hepatica acutiloba and friends; take advantage of any sunny and relatively warm day to enjoy them!
Sanguinaria canadensis 2024
Claytonia virginica
Caulophyllum thalictroides
Hepatica acutiloba pastel mix
Hepatica acutiloba pastel mix2
Hepatica acutiloba 2024-2
Hepatica acutiloba 2024-1
Hepatica acutiloba 2024-3
Hepatica acutiloba 2024
Reading seed coats
PropagationLast week we had the simple answer to the ‘up’ and ‘down’ of a seed – sowing wise. Again, do not worry about the position of the seeds when sowing. Due to gravitropism, the radicles will always go ‘down’ and the cotyledon leaf(ves) ‘up’.
https://www.mobot.org/mobot/research/apweb/top/glossarya_h.html#A
For those willing to know more about this subject, theoretically we would be able to tell the up and down of a seed by ‘reading’ the few scars that remain on the seed coat during the seed formation (after fertilisation).
To explain more, a few botanical terms that may not be familiar to all will be used. For clarification I provide links to the excellent botany glossary developed on the Angiosperm Phylogeny Website from Missouri Botanical Garden.
I quote a paragraph from the introductory notes, because I think it should give us all a moment of meditation. Keep in mind that in nature nothing is ‘white & black’, there are endless variations to all situations.
Here we go.
On the seed coat we can identify 2 main scars: the micropyle and the hilum (in most species, but there are exceptions) that can be used to identify the ‘up’ and ‘down’ of a seed. In some cases we can also see a sort of ‘suture’ along the seed, called raphe, and various excrescences like the caruncle, which is usually near the micropyle.
It is useful to know from what type of ovule the seed was formed. For the vast majority of flowering plants the seeds are born from an anatropous ovule, so we will consider it as default. In this case, the micropyle is very close to the hilum.
Post-fertilization the micropyle remains as a small pore in the seed coat, which facilitates the entry of oxygen and water into the seed during germination. The radicle of the embryo will emerge through the micropyle.
So, by locating the micropyle on the seed surface, one would know which side is up and which one is down.
What’s simple in theory many times, it is not the same in practice. The micropyle doesn’t persist in all seeds, or it is impossible to see it with the naked eye. But the hilum is often a larger scar (at least on larger seeds), and we can search for it.
We can take Caulophyllum as an example, because for monitoring the embryo development I took many seeds images years ago.
*Also, keep in mind that for practical purposes sometimes we call various fruits ‘seeds’ (the achenes for examples). What we see in this case is the fruit surface not that of the seed coats.
In very rare cases the seeds are ‘born’ from an orthotropous (atropous) ovule. In this case the micropyle is on the same line, opposed to the hilum. A well-known species whose seeds are formed from such an ovule is Symplocarpus foetidus, the skunk cabbage. Same goes for Arisaema (and most of Araceae family).
In the case of the skunk cabbage seeds, you would think there is no up and down at the beginning, but they figure it out soon after germination :-)
Without going into details, there are other sub-variants of the anatropous and orthotropus ovules; it is also worth noticing that in flowering plants most of the ovules are curved.
A simple example is the campylotropus ovule found in the legume family. In this case, the micropyle is almost touching the hilum (see Lespedeza germination).
So, in theory it looks good but imagine looking for the micropyle on a poppy seed :-) On the following plate, we can observe though that on the small seeds of Primula sieboldii, the micropyle/hilum area is visible.
A reminder about the SEEDs LIBRARY where those interested can try to locate, where possible, the micropyle/hilum area on various seeds.
1. Arisaema triphyllum (orthotropus ovule); From anatropus ovules 2. Amphicarpaea bracteata; 3. Disporum; 4. Streptopus amplexifolius; 5. Chamaecytisus hirsutus (with caruncle); 6. Primula sieboldii.
We have a particular situation in the Liliaceae family where by looking at the seeds through a backlight, usually we can see the embryo; even more so after the seeds are imbibed with water. So, it is fairly easy to tell the ‘up’ and the ‘down’ (at pointed end).
Lilium embryo
Fritillaria pudica seeds (imbibed)
Based on other images I have in my ‘germination library’, it looks like most times the root will emerge from the ‘pointed’ side of the seeds; however, not all seeds have such a side.
Asarum canadense germinated seeds
Paeonia suffruticosa germinated seeds
Asclepias exaltata germinated seeds
Epimedium ‘Amber Queen’ OP germination (warm,cold)
Trillium grandiflorum germinating seeds Oct. 7, 2017
Paris quadrifolia germinated seeds
To conclude, sometimes we could tell the up and down of a seed by ‘reading’ the seed coat, especially for medium size and large seeds, but this is not always the case. From the point of view of sowing I don’t think it matters, even for larger seeds. In nature, no one arranges them when they fall on the ground.
A nice weekend to all. Enjoy the season of ten thousand flowers!
Ups and downs
PropagationI know that seeds germination is in the mind of all gardeners in early spring.
So, I will try to answer a question someone recently directed (as a comment): “Does anybody know the orientation of the root vs plant ends on the seeds?”
Due to spam attacks, I have been trying to block the comments, because of the huge amount of time needed to sort through the junk for the ‘good’ ones. Somehow they are sneaking through anyway. The above question seemed to be from a legitimate IP address, so let’s have a look at it.
If the question was related to sowing, here’s a simple answer. No matter how you place the seeds in the pots they will find their way, down and up! The roots will always orient in a downward direction and the shoots upwards due to gravitropism. It will not affect the germination or the health of the seedlings. Exceptions may apply only in case of very large seeds (next time about the skunk cabbage germination case); when in doubt, place them sideways.
The easiest way to exemplify this is by looking at seeds germinated out of pots from my ‘germination library’. Notice the Gentiana lutea germinating seeds in a Petri dish positioning by themselves with the roots ‘down’ and the plumule ‘up’. Also, an old image of a Sanguinaria canadensis seedling (part) found in the plastic bag ‘hanging’ to a vermiculite particle. An even better illustration comes from a ‘piece’ of Stylophorum lasiocarpum seedlings grown together in vermiculite in the stratification bag. No one arranged or told them which side is ‘up’ and which is ‘down’.
Gentiana lutea germinated seeds with GA3 solution
Sanguinaria canadensis germinated seed in moist vermiculite
Stylophorum lasiocarpum germinated seeds in Ziploc bag
A couple more images showing germinated seeds of Helleborus caucasicus and Podophyllum peltatum (Mayapple) in moist towel.
I added a few explanatory notes (click to open the gallery): regardless of the the position the seeds, the radicles are always heading ‘down’ (meaning the ‘down’ of towel). The seeds who were not in the ideal position, start curving their radicle immediately to grow it in the ‘right direction’. This is one of the reasons I do not germinate seeds in moist towel anymore: the radicles get tangled easily in the towel and are very easy to break when taken out.
Podophyllum peltatum germinated seeds 3
Helleborus caucasicus germinated seeds 2
Next time we’ll talk a bit more ‘serious’ about this subject, with a recap of the plant ovules and the post-fertilization marks that can be ‘read’ on the seedcoat surface. Maybe that will scare the spammers away ;-)
Meanwhile, Happy Easter to all celebrating with a message of peace, joy, hope and happiness!
Happy sowings
PropagationAn update for this previous post, to show some newly emerged seedlings after using the Miracle Gro mix instead of the Fafard sowing mix: Minuartia michauxii, Silene saxifraga and Silene suecica. There is no need of so many seedlings, reason why I always say – take care when sowing very fine seeds.
Minuartia michauxii seedlings
Silene saxifraga seedlings
Silene suecica seedlings
It is also the time to prick out some of the grown-up seedlings before they become too crowded. Those who need help in this regard please see the: Transplanting and pricking seedlings post from 2020.
With the cold snap upon us, these are very good days to do a bit more warm sowings ;) and/or transplant seedlings.
Mimulus lewisii seedlings (from wild coll. seeds in BC and offered in the fall Seeds List); they should have been transplanted ‘yesterday’, so it’s their turn today.
Mimulus lewisii seedlings
Fight back!
PropagationWe have been deceived into an early spring in Southern Ontario and, as expected, winter returned this week. Temperatures are forecasted to plunge to as low as -10C to – 12C depending on the locality.
Hepatica newly germinated seedlings.
The main reason I am writing this post is mainly related to the winter sowings. Unusual high temperatures over the past two weeks have caused few Hepatica seeds to break dormancy and start germinating. They are difficult to notice at first. Other species shoots may be just under the sowing mix ready to show up (including the 2 years old sowings).
Very low temperatures in this stage are fatal (and you may wonder later why there is no germination!).
So, those who just like me do not have a cold frame for sowings (close it and bundled it up) I advise to take all your sowing pots inside in a garage, or any other such locations (cold basement, cellar). If you don’t have a garage, bundle them with an old blanket, top it with a plastic tarp and keep close to the house (preferably in a sheltered corner).
Even if you do not have lights, it is preferably to keep the sowings in the dark for a few days than to let them freeze to death (only if there are signs of germination the lights are needed).
With no snow cover or just an inch of fluffy snow, the extreme cold will cause problems also for the new fresh growth/flowers of a few early species: the daffodils are in buds, Hellebores and few others, few Paeonia species are growing shoots, Aconitums, Delphinium fissum have new foliage….I also noticed the first signs of Jeffersonia diphylla and buds on various rockery species. Not to mention the Hepaticas: few in flower, more in flower buds stage and the Corydalis!
What can we do? Perennial plants will not die, but maybe we can continue to enjoy the flowers. Lay thermal blankets in sensitive areas, place reversed pots on top of peonies and Hellebores (preferably lined with microfleece). This method has worked for temperatures down to -7C in previous years. I even placed burlap leftovers I found in the shed in few spots; with a bit of snow, it may make a difference.
We can only hope. Fight back the cold!
Re-starting warm sowings
PropagationMinuartia michauxii, Stiff sandwort, germinated, fast elongated seedlings in the Fafard mix (all vanished in 2 days)
A weird phenomenon is happening with my indoor sowings one species after another: the seedlings would start to elongate excessively right away after germination, just to vanish in a blink of an eye afterwards (exemplified with Minuartia michauxii). Species like Minuartia, Silene, Luetkea and others like them have done the worst; a few more vigorous ones like Campanula alliarifolia and C. glomerata have surviving seedlings that will be pricked out soon.
It is not the regular damping off of seedlings; I had it happening as well over the years, albeit very rarely. You can read in the following post, how to avoid the damping off for indoor sowing: https://www.gardenmyths.com/damping-off-disease-prevention-treatment/#Preventing_Damping_Off_Disease
I started to analyze what’s different than in the previous years. I am using the same method of sowing, clean pots, the same indoor lights (set at the same height) and the room temperature is as usual.
There is only one thing different: the sowing mix! This year, not having my usual around I used a Fafard I recently purchased. I went to look at the bag more closely. My usual sowing media in the last years has been the Miracle Gro or Pro Mix, to which I added vermiculite or perlite. Comparing the two, we can see the ratio of fertilizers the Fafard mix has. Another difference is that it contains coconut husk but that usually improves the mix drainage and aeration and it shouldn’t be a problem.
Fertilizers ratio comparison (N:P:K) I think this Fafard mix should read: Soil mix for sprouts to eat, like they show in the picture.
I see no other explanation for the excessive and rapid elongation of newly germinated seedlings: the excess of nitrogen and the salt concentration in the little sowing pot cause the fast ‘melting’ of the seedlings. When the concentration of fertilizer is too high in a larger pot, it can be washed out and reduced with each watering, but newly germinated seedlings do not need a lot of watering.
I do not want to waste my time investigating further. In Canada, unfortunately, we do not have standards for the bagged sowing and potting soils, anything goes. It is of course also my fault for not watching closely what’s written on the bag. How many people are doing it? You just grab the bag on the way to the check-out.
Newly germinated seedlings, talking mostly perennials for rockery here not tomatoes and petunias, do not actually need any fertilizer for a while. The introduction of a diluted fertilizer is welcomed later after they have grown up a while, or after pricking. What can one do besides complaining? I sowed again yesterday in Miracle Gro (where seeds still were still available) plus we can learn from my mistake. I will post an update later.
I mentioned before that it is not good to sow a whole pck. of seeds (keep ½ in case ‘accidents’ happen), now I will add the following to the general sowing advice: have a good look at the added fertilizers in the sowing mix and before sowing a whole flat of pots, better do a trial with a few seeds that germinate very fast. Wait a week to see how the seedlings do and only go full blown sowing after that.
To finish on the bright side, the first seeds of Hepatica are starting to germinate (kept outdoors) and Hepatica transsilvanica is starting to bloom :)
Timing the sowing in springtime
PropagationSome people plan well ahead about what to grow from seeds; others purchase seeds and plants on the impulse of the moment or after they see nice spring flowering pictures. Then, there are always seeds arriving late from seed exchanges.
Usually late spring orders have in common a combination of species, warm and cold germinators, so I feel obliged to repeat how to proceed at this time in order to obtain the best results with minimum effort. Good timing for sowing is important because seeds can also enter sometimes a second dormancy if not handled improperly.
This is a repeat of an older post with some updates. If you don’t need advice, jump to the end of the post for the first flowers of spring 2024 :-)
Species that are indicated to germinate at warm (15-20C) can be sown right away if you use indoor lighting for growing seedlings or later (April/early May) if you intend to keep the pots outdoors, or to sow the seeds directly on the ground (‘in situ’).
Species that can be sowed ‘in situ’ (Papaver, Lobelia, Campanulastrum, some Viola species.…) – wait until April/early May and cast the seeds in place, incorporating lightly (most such seeds are fine and need light to germinate), keep the area moist and if there are too many critters around you have to place a mesh on top of the sowing location.
Various Fabaceae can be treated with the ‘hot water treatment’ and considered warm germinators. Testing gave good to excellent results for Hedysarum, Oxytropis, Astragalus, Baptisia, Thermopsis, Lupinus*. It seems that Anthyllis and Lespedeza violacea seeds also reacts to this treatment, only that it has to be repeated many times.
See in the pictures below, how large the Lespedeza seeds that imbibe with water look like; only one seed from that batch is ready to be sown. The roots appear in about a week after that.
Lespedeza violacea after HWT
Lespedeza violacea germination start
The alternative to the HWT is of course the old fashioned method of scarification using sheets of sandpaper.
Species indicated: sow in the fall/winter or as cold/moist stratification – I advise you to keep the seeds packets in the fridge until fall, and then proceed with sowing (in pots or ‘in situ’). You can of course try to provide cold/moist stratification in the fridge, but don’t expect the same good results. Also, you may end up with seeds germinating in June/July and young seedlings by late fall which will withstand poorly the winter cold.
Species indicated to have double dormancy which require first a slightly warm cycle, followed by a cold one in order to germinate (like Hydrophyllum, Euonymus, Actaea and most peonies species) should be sown later in the summer (late June/July/August). This will give them more than enough time to develop the roots until late fall, before the cold cycle begins in the winter. The same goes for two stage warm germinating Lilium species (L. michiganense, L. canadense, L. kesselringianum…).
Again, these cycles can be provided in the house + fridge, but it is too late now to obtain good seedlings by late fall. It is of course anyone’s choice, I can only recommend the best method.
Moist packed seeds: are not sold at this time of the year, with the exception of two years germinators (Caulophyllum, Medeola, when stock supply and temperatures allow). When to sow and how to handle them has been outlined in other posts.
Orchids and other mycorrhizals (Chimaphila, Conopholis): if not using ‘in vitro’ equipment, there is a slight chance that by incorporating the seeds in the garden close to where other orchids/preferred hosts thrive will be successful. This method gave good results also for Castilleja but with the seeds sowed in late fall.
An early March garden walk dedicated to the Women’s Day!
Crocus 2024
Cyclamen coum March 7
Hepatica americana 2024
Hepatica japonica March 7
Helleborus niger
Helleborus purpurascens
Iris ‘Katharine Hodgkin’
Helleborus x hybridus
Iris reticulata
Little March
GardensIt is March 1st and the flowering snowdrops announce an early spring. Another confirmation comes from the first Iris reticulata, Eranthis, the well-developed buds of Helleborus, Adonis and Corydalis, as well as chipmunks running around. Setbacks are to be expected for sure, but what’s done is done, or better said, what’s flowering is flowering, and we cannot turn them back.
In Romania, Moldova, and with variations in other South Eastern regions (Bulgaria, Albania, Macedonia, SE Serbia), March 1st is traditionally celebrated and named Martisor (Romania). Here’s a short wiki stub for those willing to read more, and I’ll explain a bit about it.
The word Mărțișor, Mărţişug or Marţ, Martenitza (Bulgarian), comes from the name of the month, March – Martie (Romanian) and Mart (Bulgarian) literally meaning “little March”.
The Mărțișor tradition is actually a celebration of the passage from the winter into spring, which coincides with the start of a new agricultural season. The white and red string is in fact the most important element. In rural areas, red and white strings were often tied to tree branches, fences and at the house for good luck and prosperity in the coming spring.
Most often, the white and red strings have various trinkets attached to it: good luck bearers like coins, a 4-leafed clover, a horseshoe, a snowdrop or other flowers, ladybugs, butterflies, little figurines, and so on. They are gifted to women and children, depending on the region, and weared most often as a broch (also as a pendant or bracelet) with wishes for a beautiful spring and good luck.
Snowdrops made from metal, glass or ceramic and attached to the white and red string are most often used given their association with the beginning of spring :-)
All in all, this beautiful tradition is announcing the start of spring and, of course, of the new gardening season! People are starting seeds at this time, prepare the beds (where possible), clean and repair their utensils.
So, today I wish you all a Happy ‘little March’ and a most beautiful spring!
Updates and Dobrogea self-guided tour
Botanical travels, PropagationAn update to the HWT treatments of last week: Anthyllis montana and Astragalus missourinesis seeds were the first ones to react; they were sown and the first Anthyllis montana seedling showed up this morning!
It seems that not all Anthyllis are equal, Anthyllis vulneraria var. coccinea seeds were slower to imbibe, and are still receiving boiled water ‘showers’ at times; the same applies for Lespedeza violacea.
The first warm germinators are also showing up, with the fast germinating (less than one week) seeds of Dianthus nardiformis and Salvia canescens var. daghestanica.
This year I sowed less ‘rarities’ and more leftover seeds of species that I would like to have in greater numbers, and of which would be also good to have more seeds to share with the world.
I praised the Salvia canescens var. daghestanica many times. It is a short lived species here, but very easy to grow from seeds. If you are a sucker for silvery foliage like me this one should not miss from your rockery, scree garden or any other, dry and sunny area.
Dianthus nardiformis in wild habitat, Dobrogea region, Romania
The other species to praise is Dianthus nardiformis ex. Dobrogea, a late summer flowering Dianthus with very fine foliage. It is long lived but got shaded by other plants and didn’t flower well lately.
That’s why we always keep some ‘reserve’ seeds ;) The form grown from wild coll. seeds in Dobrogea is worth taking care of being slightly different than what usually goes around under this name (which I have also grown).
The seedlings of Dianthus nardiformis took me back the memory lane to their sunny and wind swept home, in Dobrogea region of Romania, close to the Black Sea.
Few other species like Centaurea jankae, Paronychia cephalotes and Thymus zygioides are adorning my garden now as a good remembrance token. Those interested are invited to have a self-guided tour of the region and explore some of its plants treasures.
Winter getaway – Dobrogea I
Winter getaway – Dobrogea II
Plant portrait: Centaurea jankae
Something old and something new for 2024
PropagationWinter returned yesterday and the kettle was on for tea; the perfect day to start the warm sowings and to test the hot water treatment (HWT) on more species. A customer asked me more details about Lespedeza violacea, Violet bush-clover, seeds recently and I realized that I forgot to check it with the HWT, so it was the first on the list.
Longitudinal section through Lespedeza japonica seed: notice the fully developed embryo, only waiting for proper germination conditions. A thin but very hard seedcoat.
Then, something that I had and never got to grow again: Anthyllis vulneraria var. coccinea; nothing very special about the kidney vetch, just that I like it and is short lived. I acquired a few seeds from a seedex (and for good measure also Anthyllis montana).
Plus, the new Astragalus missouriensis, which was offered new on the fall Seeds List. I always try to test some of the new seeds additions, which I suspect by association with similar species, to be warm germinators.
For those unfamiliar, please read about the HWT on the Germination page, or use the Search tab looking for ‘hot water treatment’. I first started to look at this method (in use a long time ago) for species in Fabaceae family, because I dislike the scarification with sandpaper.
Species in this family have only physical dormancy, ie. the embryo is ready to germinate in proper conditions (water imbibition, temperature) but cannot do so because of the hard, impermeable seedcoat. I found an image with a sectioned seed of Lespedeza japonica in an old book, which illustrates well the ‘situation’ inside the seed; those of other Lespedeza including L. violacea are similar.
For many species it is necessary to repeat the treatment because not all seeds will imbibe well after a first soak, and it seems based on the picture that Lespedeza seeds didn’t change much in size and will need a HWT repeat.
See pictures with the fruits (one seeded, indehiscent pods) and seeds and one taken today after the first hot water treatment.
Lespedeza violacea fruits and seeds: 1mm grid
Lespedeza violacea seeds after one HWT
Keep in mind that we cannot generalize that ALL Fabaceae species will react to HWT and germinate at room temperature, but it is definitely worth trying.
The other good alternative is to sow these species in late fall-winter outdoors and let the weather naturally wear down the hard seedcoats.
For the proper warm germinators, a whole batch of Campanula species was sowed (+ few others like Luetkea and Potentilla). I love the bellflowers and try to increase their diversity in my garden. There is one fitted to any location, from sun to shade and from moist to dry; the pollinators know where to find them :)
Something old: Anthyllis vulneraria var. coccinea in 2017 and something new: Campanula cochlearifolia first time flowering last summer in July.
Anthyllis vulneraria var. coccinea, 2017
Campanula cochlearifolia, July 2023
*Reminder: if you try to germinate something at room temperature and nothing happens after 3-4 weeks, move the pot in a cold location for 1 (2) months and then bring it back to warmth. I never had good results and the patience to wait 3 months for something to germinate at room temperature (like some sources are suggesting).
Friday’s seeds: the curious case of Leptarrhena pyrolifolia
Wildflowers of North AmericaLeptarrhena pyrolifolia seeds: light brown, fusiform and partially ribbed with long tails at both ends.
I first wrote a very short post on Leptarrhena pyrolifolia seeds in 2018, after receiving a small package of seeds from a friend. I was wondering that time about the particular shape of the seeds, different than any other seeds of the Saxifragaceae family I’ve seen.
In a way it makes sense, Leptarrhena pyrolifolia (Leatherleaf saxifrage) is the only species of its genus. The name comes from: Greek leptos, slender, and arrhen, male, alluding to stamen filaments (FNA).
So, seeds-wise I knew what to expect when I had the chance to see it for the first time last summer during a trip to BC. What I didn’t expect was how much more handsome this species is in reality, more than pictures can show. It often happens, nothing beats seeing a plant in ‘situ’ among its companions.
Leptarrhena pyrolifolia is a cold hardy, evergreen perennial plant species that inhabiting wet meadows and wet cliffs, usually found around stream banks and seepage areas. It grows in mountaineous areas of AB, BC, NWT and Yukon (Canada) and the US.
Leptarrheena pyrolifolia fruits in foreground, along an alpine stream
Leptarrhena pyrolifolia in habitat, a moist meadow
The Leatherleaf saxifrage grows from a rhizome and like the common name implies, it has attractive, leathery, shiny and toothed leaves, similar in shape and texture to those of most Pyrola species.
From the compact carpet of glossy leaves, arises a tall flowering stem up to 25-30 cm bearing clusters of white/pinkish flowers in mid-summer. Easy to observe later are the conspicuous red fruits, a very nice addition to the overall aspect of the plant (the red capsules resemble a lot those of Triantha glutinosa, another moisture loving plant).
I wonder why this species is not more widespread into cultivation, especially considering that it has evergreen foliage and it is a very cold hardy species; qualities that those living in cold climates always appreciate in a plant.
Mats of Leatherleaf saxifrage foliage in a rocky, moist meadow, BC.
Maybe we can change this situation. Why not consider going beyond the more ‘regular’ saxifrages and also grow Leptarrrhena? It will do well in a slightly moist place, in the rockery or elsewhere in the garden, with other moisture loving species like for example: Zigadenus, Lobelia cardinalis, Gentiana andrewsii, Primulas, Silene pusilla, various sedges….. Due to its rhizomatous nature, it can be used as a small scale, evergreen groundcover.
It is a bit late to sow species requiring cold/moist stratification (unless provide stratification in the fridge), but I have it on my list for next year. For now I will give it a try with GA3 as soon as I ‘turn on the lights’ just to see how it goes.
*There are reports of medicinal usage of Leptarrhena among the Aleuts of Alaska and Indigenous People of British Columbia, most commonly applying a poultice of chewed leaves to wounds.
So, keep this in mind, you never know when the leatherleaf saxifrage will come in handy :)
Ready, start, go – 2024!
PropagationSpecies started indoors last year in February and taken outdoors in April for acclimation: Draba, Bukiniczia, various Campanula.
This is the almost traditional post for this time in February when the washing of the pots for indoor sowing starts!
I never wash the pots for outdoors sowing, but you may want to avoid bringing indoors eggs of various insects which can remain attached to pots, and who knows what else. It is enough that we have to deal with the fungus gnats, which are almost impossible to avoid indoors.
More than ever a varied array of indoor lighting is available for all budgets. Beginners can even start with just a simple lamp, sufficient to cover 4-6 small pots kept on a table/desk corner. Plants wise, I repeated many times, start with easy to germinate and grow species before trying others more challenging.
You can find a whole, updated list of warm germinating species in last’s year post: Ready, start, go 2023!
Some species will germinate with no treatments, for others you can apply various treatments like GA3; more details and links are given in the same post.
In the gallery below, timelines for Gentiana asclepiadea started in Feb. with GA3; by Nov. the grown-up seedlings were already planted in the ground!
Gentiana asclepiadea germination Feb13, 2023
Gentiana asclepiadea seedlings Apr. 24, 2023
Gentiana asclepiadea seedlings Nov. 15, 2023
While the purpose of this early seeds starting is to extend the growing time in our cold climate, where otherwise sowing directly outdoors is not possible sooner than mid-April (or May), it is also a great winter pastime when crazy gardeners crave the feel and smell of the potting soil, fresh growth and there is nothing to do outdoors :) Not all our seedlings will survive (and it’s a good thing!). But most will grow and thrive, and we’ll be proud of them, even if they are very easy from seeds, like all Gypsophila species for example.
Gypsophila cerastioides seedlings Feb. 17, 2023
Gypsophila cerastioides April 21, 2023
Ziziphora clinopodioides grown-up seedlings; a drought resistant, aromatic species that requires very good drainage.
Otherwise, it is perfectly fine to sow all the warm germinators outdoors when the temperatures allow according with your locality.
Again, for those who don’t like to go back and read older postings or the Germination page ;) I recommend to amend any sowing mix you purchase with vermiculite (even my favourites brands, Fafard and Promix, contain too much peat). For more ‘pretentious’ species I even add a bit of perlite to the mix to obtain a ‘stellar’ drainage.
My 2024 sowing list contains: species from previous years I didn’t get to sow, a few new ones from friends, few from this summer BC collection; plus some that should arrive from a seeds exchange.
I must redo Potentilla porphyrantha which I lost, Salvia daghestanica and Phyteuma orbiculare, and I am looking forward to sowing for the first time Nepeta multifida, Campanula glomerata, Allium wallichii, Luetkea pectinata……to mention just a few. I am sure I’ll have to draw the line somewhere and the rest will be switched to the sowing list of 2025!
Let the February fun begin!
January thaw
PropagationThis year we are experiencing a classic January thaw in Ontario. Not only we have above 0°C temperatures, it is also raining. It is a welcome respite from frigid temperatures for both people and plants, and also on this occasion the snow cover gets diminished (where applicable), with nice surprises showing up!
The jump to an unseasonable warm weather in mid to late January, is a weather phenomenon most usual observed in specific Northern Hemisphere regions called January thaw; also called ‘bonspiel thaw’ on the Prairies provinces. Actually it lacks a formal recognition as being a meteorological event and it is not even happening every year (or it can be a February thaw).
Seeds-wise, at the end of January we are at a crossroad. We can still sow species that require cold/moist stratification (fingers crossed it remains cold enough until March) and also start sowing species that require only a short cold/moist stratification or even warm germinating species (with good indoor lighting systems).
Sowings of Gaultheria humifusa and Oenothera macrocarpa: the bundled up pots are in the fridge for about 1 month of cold/moist stratification; the front row pots are kept at room temperature (+/- 20C enclosed in a plastic bag).
I personally wait a bit more for sowing the straightforward warm germinators, but two recently packed species in a couple of orders caught my attention. Both Gaultheria humifusa and Oenothera macrocarpa, are considered warm germinators and allegedly may germinate better after a short cold/moist stratification period. I never had the occasion to sow them before and had to trust the germination advice from other sources.
It is a good occasion for a little experiment!
For comparison, I have to try them both ways: 1) direct germination at room temp., and 2) with 1 month of cold/moist stratification (in the fridge). We’ll see which ones germinate better and I’ll show the results later….
It is well known that various species that otherwise qualify as warm germinators (seeds only have physical dormancy) may benefit from a period of cold/moist stratification, which allows for a more rapid breakdown of the seedcoats and start of the biochemical processes involved in the germination initiation.
In some cases, instead of a slow germination of 1-3 months at room temperature, we may obtain a more rapid and uniform germination after a short cold/moist stratification; so it is worth trying it.
For the same reason, if you like to do just one sowing for all your seeds in late fall/winter, it is OK. The warm germinators will germinate in the spring with the raise of temperature, usually with a greater uniformity.
Let’s keep in mind that germination patterns for any given species can vary depending on the collection locality and mother-plant characteristics (epigenetic factors), so do not be surprised if your results don’t match sometimes the generally claimed germination requirements.
Winter time is best for learning more about propagating various species from seeds and about germination in general. Not to mention that we also end up with nice plants for our gardens!
Greens and golds
Wildflowers of North AmericaWe are all tired of the extreme cold and cleaning snow by now and dreaming of greens and other colors. When selecting a few spring pictures for a short garden walk to enjoy bright, warm colors I stumbled upon the cheerful flowers of Chrysogonum virginianum Norman Singer’s form.
Chrysogonum virginianum Norman Singer form
It is a good occasion to spread the joy about Chrysogonum virginianum (green and gold, goldenstar), particularly about the Norman Singer form, which was named after a North American Rock Garden Society founding member (nowadays remarketed as Chrysogonum virginianum ‘Superstar’).
You can read an excellent plant portrait on the Ontario Rock Garden Society website, by Robert Pavlis, from whom I also received a division few years ago:
https://onrockgarden.com/index.php/plant-of-the-month?view=article&id=88:chrysogonum-virginianum-norman-singer&catid=22
I have nothing much to add to the plant portrait, except for the fact of being indeed an excellent low-growing, mat forming plant that every garden should have! You won’t know until you try it.
Almost evergreen, with large, bright yellow flowers (reblooming sometimes), Chrysogonum virginianum Norman Singer form is one of the best edging/groundcovering species for a sunny to part-shade location. Mat forming doesn’t have a bad connotation in this case, because the rhizomes are short and it grows very compact. I even had a division growing in a full shade location for a while, just that it didn’t flower so well.
Join the ORG&HP Society and participate in the Spring plant sale, maybe you’ll get lucky and find a division for yourself!
Degenia velebitica
A question on everyone’s mind is how will some of our plants fare through this low temperatures period? Most will be OK, it is not the first time it’s been so cold in this region (after all we are zone 5).
More damaging than the cold are the winter rain periods of which we got quite a few in December; so I worry more about some of the rockery plants, like the young Degenia velebitica shown here, which require excellent drainage and ideally would spend the whole winter under snow. We’ll have to wait for spring to see the results.
Until then, a few green and golds and other spring warm colors.
Primula macrocalyx
Primula sibthorpii
Hepatica americana pink form
Lathyrus vernus pink
Odontarrhena obtusifolia (syn. Allysum borzaeanum)
Pulsatilla ex. styriaca pink, April
Uvularia grandiflora
Paeonia peregrina
Linum capitatum, June 2022
Incarvillea delavayi
Fritillaria collina
Dianthus deltoides ‘Deep Confetti Red’
Adonis: a slow, beautiful affair
PropagationWhat else better for a January gloomy day than the last April’s bright Adonis ramosa flowers? Interested to know more about early flowering perennial Adonis species? I organized my material worth a few years and will share my adventures on growing a couple of them from seeds.
Adonis ramosa starting to flower, April 1st, 2023
Not everyone may be familiar with these wonderful early spring harbingers; most early spring flowering Adonis species are native from Europe to Far Eastern regions and Japan, and only occasional they end up in our Canadian gardens. The most cultivated species are Adonis vernalis, Adonis amurensis and Adonis ramosa. They are all very cold hardy and grow from a rhizome, being long lived plants.
The flower buds start pushing through the ground as soon as the snow melts and the sun starts shining stronger in early spring when nothing else attempts to flower, except the snowdrops. The large, bright yellow flowers are delightful, both for us and the first early spring pollinators. Beautiful ferny-like foliage in various degrees develops soon and it will grow until early summer; afterwards the plants will enter dormancy.
Usually these species are not available for us mortal ;) gardeners in Canada. When and if it happens, be prepared to spend a considerable amount. There is an explanation for this.
Being more familiar with Adonis vernalis and knowing it would be more adaptable to our dry summers, years ago I embarked on finding seeds of this species for sowing. I managed to acquire a few dry Adonis vernalis seeds twice. They were just a few months old, but unfortunately they didn’t germinate although I kept the pots for 3 years, allowing multiple cycles of warm/cold.
Adonis vernalis pictured here many years ago at the Wrightman Alpines’ former location. Keep an eye on their coming 2024 catalogue, maybe it will be listed.
Like in many other members of Ranunculaceae family, Adonis seeds* are hydrophilic and fresh seeds are required for successful germination. This is something very hard to find mostly because the seeds are dispersed while still green and are hard to catch (similar with Hepatica; see explanations in the last gallery below).
More than this, similar again to Hepatica and other Ranunculaceae, the green seeds have an underdeveloped embryo at the time of dispersal. So, the seeds exhibit morpho-physiological dormancy and they need an after-ripening period to form cotyledon stage embryos.
*The seeds are actually achenes (just like those of Hepatica), so more correctly should be called fruits, but for the sake of easiness I’ll go with the term seeds.
Then, a few years ago a friend sent me fresh seeds of Adonis amurensis :) “Fresh” meaning 2-3 weeks old. I sowed them right away and the germination was fantastic in the spring of 2019.
In the first season the seedlings grow only with cotyledon leaves (a trait common for many rhizomatous species), then they go dormant in the summer and restart to grow next spring; again a short growing season…and so on… For this reason, the bulking up of the rhizome is a slow affair with Adonis. The seedlings need to be grown in the same pot for 2-3 years before being planted in the ground (when dormant).
Adonis amurensis one year old seedlings, 2019
Adonis amurensis foliage, 2022
In 2021, I kept a few seedlings in a pot, and a couple were planted in the ground. I lost a few to the drought of 2021/2022. Fast forward to spring of 2023, a few young plants were alive and growing but none flowered; maybe this spring?!
So, you do the math….and here’s the explanation for the rarity in cultivation and the price.
I was also lucky to also receive a division of Adonis ramosa from another gardening friend in the fall of 2020. Planted dormant in the fall, it promptly showed up next spring with two flowers, and they even formed a few seeds (which I promptly sown).
Last April, we had an uneventful spring, so the flowering was exquisite and also nice seeds were formed. Of course, I sowed them again for myself and also shared a few of them to spread the joy. Notice the seeds aspect and the catching method with organza bags, the same used for Hepatica.
Adonis ramosa fruit heads-seeds, May 2023
Catching Adonis ramosa seeds, 2023
Adonis ramosa 2 years-old seedlings, 2023
Conclusions for growing Adonis amurensis and A. ramosa from seeds, from my personal experience:
Sow only fresh seeds! (meaning only a few weeks old) in pots or directly in the ground.
Allow the natural variations in temperature (summer/fall/winter; the seeds may not germinate in the first spring if the embryos do not develop well or if the cold period in winter is insufficient! so do not cuddle them in a greenhouse).
Grow the seedlings in the same pot for 2-3 years (no pricking); water well and use a light fertilizer when in growth to maximize their growing season.
Transplant only when dormant (late summer-fall) in a well-drained but with moisture retentive substrate, in a sunny to part-shade location. If your region has hot, dry summers, a location with afternoon shade is a must.
Be patient, eventually the seedlings will flower after 4+ years. Meanwhile, grow many other companion plants for them!
Once again, my gratitude to all who are sharing with me their precious seeds and treasured plants divisions!