The first Hepatica started to flower a while ago bringing high hopes of an early spring. Then, cold, bitterly temperatures returned in Ontario and everything has come to a halt. Taking pictures it is always a good way to record the start of growth for various species in the garden and in the wild. It is not only about the pretty flowers ;)

But records apart, I admit it is mostly about the joy seeing the first new shoots and leaves appearing from the ground. After our cold and long winters, the feelings of anticipation and expectation that an early spring brings can hardly be replaced by anything else.

Leaving Hepatica and Caulophyllum aside, I will show early starting NA native species from the garden (most were grown from seeds). The first picture in the gallery is from the garden; second one from the garden or woodland later in the spring/summer (hover for names).

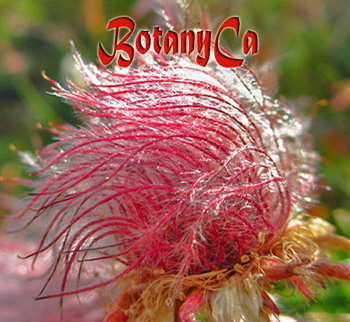
First, the evergreen Geum triflorum (Prairie smoke). It retains a decent foliage all winter long and at the first spring signs will grow new foliage and start flowering. It is quite amazing to have these healthy looking, large clumps in April!

Allium tricoccum (Wild leeks, ramps) foliage; mine are young and may not flower this year.

Podophyllum peltatum (Mayapple) little umbrellas, as well as the first Sanguinaria canadensis(Bloodroot).

Stylophorum diphyllum (Woodland poppy) emerges with the flower buds, well prepared for an early flowering in May.

In the feature image: our beloved Primula mistassinica; this species retains a small rosette over the winter and the flowering stems start growing in early spring.

The native species April-fest will continue soon after I prepare more pictures.
*Note: links are provided for those interested to read more about the species, but of course seeds are not available for many at this time.


Even if just for my own pleasure and occasional exchanges with friends, I like to give names to special plants that are obtained from seeds. I don’t spend time thinking for a name; they just dawn on me after a while always in relation with the person who provided the seeds, the origin of the seeds or some important event associated with the flowering, or a special color.

This Corydalis caucasica ex. fo. alba grown from seeds flowered first time last year and now it seems established in the garden. Not fo. alba anymore, even better! I particularly like the mauve lips in combination with the pure white spurs; one of my favorite color combinations, and not only for Corydalis. Its color starts deeper and becomes lighter as the flowers age.

So, I named it ‘Nadezhda’: to remind me of all of the above and about springtime in time of a Covid crisis. (Nadezhda in Russian = Hope in English)

Corydalis caucasica ‘Nadezhda’

Happy Easter Holidays to all celebrating at this time!


Young Caulosaurus :)

While talking Caulophyllum, here’s something I didn’t get around to show in late September last year: a bunch of Caulophyllum (most probably giganteum) 2 years old seedlings I dug out to replant.


As mentioned before, the large seeds of Caulophyllum, which require 2 years for germination, can be easily sowed ‘in situ’ (in the garden, woodland floor) in a shaded area, preferably close to another perennial/shrub. During dry spells some watering is required; otherwise there is nothing else to do.
When ready, they will germinate. If sown well-spaced there is no need to transplant them.

One early spring pleasure is to see the purple shoots erupting from the woodland floor. I still hope to be able to do it. Until then, the little ones from the garden are doing a good job.

 *Attention to the clients who have purchased seeds 4 years ago as C. thalictroides: it is very probable you actually have C. giganteum.

Caulophyllum giganteum seedlings: all seen here were sowed/ growing too close together; it was a good time to dig them up and replant them properly in September


We talked about seeds and  Hepatica germination – we need to have patience. Not only the seeds may germinate in the second year after sowing even if they were kept moist, also the seedlings, in most cases, are not very fast to develop.  Some will remain at the cotyledon leaves stage in the first season, others will grow one true leaf. In either case, they can be quite tiny and intimidating.

Let’s see about transplanting.

When to transplant?
One feature of Hepatica is that they put up a good growth in the spring through summer (roots, leaves, seeds, future flower buds) and then they take a ‘break’ until next year. For this reason I like to transplant in early spring or if not, in the fall; at least, the young plants will start the next season already well prepared.

What potting mix to use?
There are various recipes recommended by Hepatica growers. Unfortunately, most are not easy to reproduce exactly here. I’ve tried to mix various products available in the last years and some were better than others. What I want in the end is to have an easy to reproduce recipe using soil brands anyone can buy (in Canada).

I came up with this mix, which I think is pretty good: mix all ingredients in equal parts (1:1:1)

Perlite
Pro-mix potting soil
All-purpose potting mix:  Fafard brand is a good one. Unfortunately this sector of the landscape industry is non-regulated and most brands don’t specify the contents of the potting mix, plus, in almost in all cases they contain too much peat.

As a rule, as long as good drainage is ensured all should be well, so other combinations could be tried.

 Pots

Taller pots are preferable. You can basically use any type/size of pot proportionally sized in regards to the seedlings size and transplant 1-2 seedling/pot.
To avoid handling many individual small pots one can also use a rectangular planter instead. Another option is a compact-tray with a good height.

Transplanting
Remove the seedlings from the sowing pot and carefully separate them. As seen in the pictures, Hepatica seedlings have a fine root system.

Transfer the seedlings in a new pot, add mix and take care to press only around the roots. The watering will settle down the mix well (add more mix if necessary).

Clockwise: Hepatica acutiloba pastel mix – seedlings removed from the pot; Hepatica japonica transplanted, flowering seedling, H. acutiloba pastel mix seedlings showing the roots; compact-tray with H. nobilis and H. acutiloba seedlings

Location: same like for adult plants, keep the pots/trays in a location with plenty of sun in the spring and shade starting summer. If necessary cover them with a plastic mesh. Water when necessarily (deep watering and let dry between) if the pots are not exposed to rain; a light fertilizer during the spring growth is beneficial.

Planting in the ground:
Usually in the third year the seedlings  can be planted in the ground.
To continue growing in pots transplant again to a larger size pot/container. Hepatica species are fitted for container growing if you have a small garden, or unsuitable soil conditions. You can easily provide sun in the spring and shade starting summer by moving the container in different spots.

Most often also the first flowers will appear in the third year to reward your efforts!

Various forms of Hepatica japonica 3 years-old plants

*I referred in general to Hepatica because in the end there is no difference between various species when it comes to germinating the seeds and transplanting (H. americana, H. acutiloba, H. nobilis, H. japonica and H. henryi).

What do they have in common? Nothing, only that both deterred me from finishing the article on transplanting Hepatica seedlings.

But I don’t want to waste the occasion on showing something about Roscoea scillifolia fo. atropurpurea while I still can. As soon as possible it will be planted in the garden; just couldn’t figure out a proper space for it last year.

Shown here – the way the rhizomes like to bury deep into the pot (the same happens in the ground) and the distinctive ‘whiskers’ around the apical buds of R. scillifolia fo. atropurpurea (a good ID character ;).

Roscoea scillifolia fo. atropurpurea rhizomes; notice how they went deep into the tall pot during growth. The pot was kept in the garage over the winter (no watering).

If you grew Roscoea from seeds and/or have 3-4 years old rhizomes, they can be planted in the ground in late spring. Please read again: Contractile roots- a journey to the centre of the earth where I mentioned why and when this is best done (in a cold climate).

*Keep in mind that most Roscoea are showing up late in the season and more than this, R. scillifolia fo. atropurpurea has small flowers, so it needs a proper location in order to enjoy it.

Roscoea scillifolia fo. atropurpurea flowering in the summer

** The slugs are active now and careful watching for damage signs can help in early detection to avoid further damage to the seedlings and plants. It takes time but worth doing it.

We discussed last year about the hot water treatment, a very easy to apply germination method which can successfully replace the use of scarification for the Fabaceae species. However, it is hard to say if it would be effective for all species and if all species will germinate at room temperature afterwards.

In addition, I will provide answers to few common questions and plates with seeds images for all species/genera I personally tried/try with this method.

How much the seeds should/will swell after a hot water treatment?
It depends on the species, the size and shapes of the seeds varies greatly, but usually the seeds can increase in size 2-3 times than the original size. Sometimes you may notice a ‘dramatic’ change in the seeds aspect/size (ex. Lupinus breweri).

Is it possible that no seeds will swell after 1 treatment?
Yes, it can happen, repeat again (for ex. Senna hebecarpa, Oxytropis, Trifolium seeds are slow to react).

How much time should the seeds remain in water?
Usually the next day you will see if the seeds have swollen (and how many), but to be sure you can keep them in the water for 2-3 more days (change the water daily).
In extreme case, seeds may even start to germinate in water after a while! (Hedysarum, Thermopsis).

Will all the seeds swell at once?
No, in the majority of cases after the first treatment only a few seeds will swell. Sow the swollen seeds after each treatment and repeat for the others (2-3+ times).

How soon will the seeds germinate?
It varies greatly with the species, some will start to germinate in few days, others will take a longer time (for ex. various Baptisia were slow to germinate).

Fabaceae – Hot water treatment 2019; notice the increase in size and the differences between species; all were germinated at room temp. afterwards

Current trials:

Fabaceae – Hot water treatment 2020; seeds aspect after 2 treatments. For each species notice seeds still of normal size and also swollen seeds.


I recently got a question about pricking seedlings. It referred particularly to Aquilegia flabellata and Capnoides sempervirens started in early February, which are now starting to look a bit unhappy. Liz (not real name) did a very good job! and notice the coir fiber pot used for Capnoides (it can be planted as a whole in the ground).

This is a good occasion to talk about if, when and how to prick out seedlings in general.

So, you got your seedlings growing. What next?
Most will need to be prick out. Common saying is that this should be done after the true leaves are formed. Usually we are doing it much later.

It all depends on what species were sown, the size of pot used and germination percentage.
For species with very good germination rate, the sowing pot will get insufficient to sustain a good growing for all seedlings.
From my warm sowings of this year: Thymus zygioides, Paronychia cephalotes, Acinos alpinus…..they are all pricked out as of last week.

How to proceed? I will exemplify with pictures of Anthemis carpatica seedlings of last year.
First, let the mix to dry out; if the mix is too wet most fine roots will break when you try to separate them. The more roots you preserve, the better.
Gently squeeze the pot on all sides; the content should easily slide out (if too wet, wait a few more days).
Place the pot content on a tray, plastic sheet…then separate the seedlings. Ideally, the roots should easily come loose when trying to separate the seedlings.

It is quite amazing how many seedlings will come out from a 6 x 8 cm pot! Lower right corner – Silene suecica before pricking out last week.

Since we are not talking nursery production :) it is best to not prick out individual seedlings, especially for species with fine seedlings (discard the very week or the ones with broken roots). I usually make bunches of 2-3+ seedlings and repot them together in a pot with fresh potting mix. By transplanting in bunches you obtain a nice clump-like looking plant fast. Large seedlings are best potted only 1-2/pot (Centaurea, Eryngium, Helleborus….).

Various pricked out seedlings; choose the size of the pot accordingly with your needs: Oxyria dygina, Centaurea orientalis and Acinos alpinus

Water thoroughly.
Wait 1-2 days before placing the pots again under the lights (if outdoors – keep them out of direct sun for few days).

*Various Fabaceae may not react kindly at transplanting and it is best to do it fast before the roots grow too long. Same applies for the true alpine species, which grow up very long roots although the aerial growth seems small.

It is good to learn from mistakes, so I will show a Lupinus breweri seedling of last year: I waited too long for transplanting, that’s for sure! The plant survived but later slowly disappeared. Most Lupinus species are prone to do this and are best sown directly in the garden or pricked out very, very young.
The same goes for Astragalus, Oxytropis and other ‘legumes’.


What happens if you don’t transplant the seedlings?
In some cases, the young plants will stop growing because of lack of nutrients and space. Especially in small pots all potting mix is ‘consumed’ by the roots which will became entangled at the bottom. In most extreme case the seedlings may perish or get sick.

We can learn again from my mistake. Last year I failed to prick out all seedlings (again). In the plate below, I show 3 species I transplanted only in October. Notice the root system of Anemone caroliniana after growing in a small pot from May to October!. Being too late for the roots to have time to re-establish, I transplanted the Anemone and Clematis in larger pots without separating the seedlings.

!Various species seedlings do not need to be pricked out and react badly if you try to do so.
I already mentioned this for Arisaema species, Roscoea, most Liliums, Fritillaria spp., Podophyllum, most Iris; in general any rhizomatous/bulbous/tuberous species (Allium, Calochortus, Crocus, Gladiolus,….). They are all best grown in the same pot for 2+ years.

If you realize the sowing pot is too small to ensure good growth, the best option is to transplant the whole content in a larger pot. This can be done at any time during the growing season (Lilium philadelphicum 2 years old seedlings transplanted as a whole in a larger pot shown above).

Another option is to wait until the seedlings go dormant and repot the little bulbs/tubers in new pots, keeping the same depth where you found them. Problem is that in many cases they are tiny, and most likely some will be lost in the process (I’ve been there).

Good luck and keep growing!


With the first snowdrops in bloom spring is undeniably in the air. It is an exciting time with renewed hope and we all think about new plants to add in the garden.
Some people plan well ahead about what to grow from seeds, but others maybe purchase seeds and plants on the impulse of the moment. Then, there are always seeds arriving late from seeds exchanges.

Because all the latest orders had in common a combination of species, warm and cold germinators, I feel obliged to repeat how to proceed at this time in order to obtain the best results with minimum effort. Good timing for sowing is important!
If you don’t need advice, jump to the end of the post to see a few ‘green things’ from the garden :) All grown from seeds, except the snowdrops.

For those in the Northern Hemisphere

Species that are indicated to germinate at warm (15-20C) can be sown right away if you use indoor lighting for growing seedlings or later (April/early May) if you intend to keep the pots outdoor.

*Species indicated to have double dormancies and require first a slightly warm cycle, followed by a cold one in order to germinate (Hydrophyllum, Euonymus, Actaea…) – can be sowed later, in the summer. Most Peonies are also in this category; sowing in late June/July gives them more than enough time to develop the roots until late fall. Same goes for two stage warm germinating Lilium species (L. michiganense, L. monadelphum…).

Various Fabaceae can be treated with the hot water treatment and considered warm germinators. Last year tests gave excellent results (Hedysarum, Oxytropis, Astragalus, Baptisia, Thermopsis, Lupinus*).

Species that can be sowed ‘in situ’ (Papaver, Lobelia, some Viola spp.…) – wait until April/early May and cast the seeds in place, incorporating lightly (most such seeds are fine and need light to germinate), keep the area moist and if there are too many critters around consider placing a mesh on top of the sowing location.

Species indicated as: sow in the fall or cold/moist stratification – I advise you to keep the seeds packets in the fridge until fall, and then proceed with sowing (in pots or ‘in situ’).

You can of course try to provide cold/moist stratification in the fridge, but don’t expect the same good results. Also, you may end up with seeds germinating in June/July and young seedlings by late fall withstanding poorly the winter cold.

 Moist packed seeds: not sold at this time of the year, with the exception of two years germinators (Caulophyllum, Medeola), when stock supply and temperatures allow.

Cypripedium: if not using ‘in vitro’ equipment, as discussed already, there is a slight chance that by incorporating the seeds in the garden close to where other orchids thrive, to be successful. Note the ‘slight chance’.

Those in the Southern Hemisphere: reverse the timings, sow the cold germinators, keep the warm ones in the fridge.

Many articles have been published regarding the relationship between the intra/interspecific variation of floral organs and the primary pollinators, and not only for Aquilegia.
So, it seems a bit superfluous to repeat that the length of the nectary spurs in Aquilegia species is an adaptation that has evolved to match the feeding structures of their pollinators (bees, hummingbirds,…and not only). The spurs development is achieved purely through cell-shape anisotropy.

In the case of Aquilegia ecalcarata, the spurless columbine, according to various sources the main pollinators are syrphid flies (with short feeding structures). Not having spurs, doesn’t make it a ‘false’ aquilegia; it is just a classic example of “use it or lose it” evolutionary syndrome :+)

A few studies using ancestral character reconstruction of pollination  syndromes have shown  that  the  ancestor  of  the  genus was pollinated  by  bees/bumblebees (see notes).*
Aquilegia ecalcarata it is the only species that has lost its spurs.


Aquilegia ecalcarata Maximowicz, was reconsidered for a while under the name/genus of Semiaquilegia ecalcarata (Maximowicz) Sprague & Hutchinson; S. ecalcarata f. semicalcarata Schipczinski; S. simulatrix J. R. Drummond & Hutchinson.

Things have changed and, the genus Semiaquilegia Makino, is now recognized as a sister genus to Aquilegia (based on petal evolution and geographical affinities). It includes tuberous , herbaceous plants which differ from the genus Aquilegia L.

To set the record straight, we should use only the name Aquilegia ecalcarata. In keeping with my good sowing tradition for Aquilegia, I just treated a few seeds with GA3 500 ppm solution.** Sowing will follow tomorrow (cold/moist stratification for 1-2 months works very well, I just want to start them early).

* Extended phylogeny of Aquilegia: the bio-geographical and ecological patterns of two simultaneous but contrasting radiations:
http://www.plant-animal.es/pdfs/Bastida.et.al.2010.Pl.Syst.Evol.pdf

**For those in need, a reminder that they can read about GA3 preparation and utilisation on the Germination page: here

Today, few species from the sunny, wind swept rocky hills of Dobrogea region (Romania). There are no plans to collect there again soon, so I suggest to take advantage while possible.

From the ‘to try again’ list: Paronychia cephalotes. Interesting, showy and not often cultivated, the seedlings are not difficult to grow; I even enjoy it in the rockery for a while. Sadly it never went any further. I suspect the limestone based substrate had something to do with it.

Paronychia cephalotes germinated seeds

From the ‘sow while still available’ list, from the same habitat with Paronychia: Minuartia glomerata and Thymus zygioides (and few others not yet germinating).

I also recommend Hedysarum grandiflorum.  My young plants were looking good when last I saw them in late November. The seeds were germinated using the ‘hot water method’  – again, a very useful method for germinating any species within the Fabaceae family.


Some of the newly sown seeds are starting to germinate!
Warm germinators sown in February and grown under lights indoors, can be acclimatized outdoors in April/early May and in many cases planted in the ground by June. At least that’s my method, and I recommend it to those from a cold climate. The young seedlings are establishing fast in the ground and by late fall have developed a good root system to withstand the winter. An examples of last year with: Cerastium alpinum var. lanatum and Minuartia verna. By late summer Minuartia was also flowering.

Also from the screes and rock ledges of Carpathian Mts., the newly sowed Acinos alpinus is starting to germinate. I suspect it will be an easy to grow species at the edge of the rockery.

Acinos alpinus germinated seeds

Besides sowing new species, I also re-sow species with which I wasn’t successful, yet (from various reasons). Anthemis carpatica ssp. pyrethriformis, it is one of these species and I will persevere. It may be that I still have to found a proper location for it in the garden/rockery. In the featured picture, seen last year in July.

Anthemis carpatica ssp. pyrethriformis newly germinated seeds

More to follow….

There are many other warm germinating species in the Shop that can keep you company :) or maybe you got seeds from seeds exchanges or other sources. This is the right time to sow, if using indoor lights.

*For those who don’t use indoor lights and can only sow outdoors: keep the seeds in the fridge and start in late April/ early May (depending on the weather).


Do you wonder about your Fritillaria seeds/seedlings/young bulbs? Wonder no more.

With many thanks to a very impatient grower, we can have a look at Fritillaria recurva little bulbs. Also, at my germinating seeds of Fritillaria atropurpurea.

The one-year old bulbs were found at the bottom of the pot. Fritillaria seeds are adapted to wind dispersal (like many Liliaceae actually) and should be sown superficial; then, the growing seedlings will adjust the bulbs to their desired, proper depth.

Fritillaria recurva: seeds to one-year old bulbs

My stratified seeds of Fritillaria atropupurea on Jan. 1st are starting to germinate (1,5 months of cold/moist stratification). And, by the look of the embryos, Fritillaria affinis will follow shortly.

As I already mentioned,  I’m not much of a Frits grower. I’ve grown a couple of species (non-flowering yet) and only this season I have sown more. By the way it goes, it is best to grow the bulbs in the same pot for two years; if necessary transplant the whole content of the sowing pot in a bigger one, keeping the bulbs at the same depth.

Fritillaria atropurpurea germinating seeds after 1,5 months cold/moist stratification (fridge)

If you have pictures related with the Frits species seeds purchased, please don’t hesitate to share!


By tradition in February I start the so called ‘warm sowings’: species that will germinate at room temperature. The seedlings are grown under lights indoors and by April/early May can already be acclimatize outdoors; in most cases, they are planted in the ground shortly after.

It is also a time when warm germinating species are re-tested for germination. Most species keep good germination rates for +/- 5 years (kept dry/cold) but there is no data available for all.

So, I considered necessary to re-test Ephedra distachya. It seems that the seeds are in good standing, starting to germinate in water in a few days. For those interested – the seeds are back in stock! If you want to grow something beautifully ‘different’, this species is for you.

Watch its journey from seeds to young plants in the plate below. This Ephedra likes hot summers, and it was no surprise that after a slow start in May/June (rainy & cold in 2019), has put up a nice growth from August till late fall.

Ephedra distachya 2019 journey from seeds to young plants in the ground; a reminder that it is a dioecious species – keep and grow a few seedlings for assurance of female/male plants ratio

The ‘warm games’ are declared open at BotanyCa; stay tuned for more seeds/seedlings happenings!

The bitteroot seeds I sown a month ago have sprouted. I looked at the little seedlings and thought about their story; the story of spetlem, from a time when the species wasn’t even yet described!

Lewisia rediviva seedlings; seeds sown January 4th, kept at room temp. for +/- 10 days, then in the garage (+/- 5C). I was planning to put the sowings outdoors but there was no snow for a while…The germination pattern can vary depending on the collection site (origin for these seeds: Butte Co., California)

An excerpt from an article recounting the discovery of the species during the Lewis and Clark expedition, available here: http://www.lewis-clark.org/article/311.
“An old Flathead Indian woman sat weeping on the bank of the In-schu-te-schu, or Red Willow River, in the shadow of the Chi-quil-quil-kane, or Red Mountains, singing a death song for her starving children. The rising sun heard her plaint, and sent a red spirit-bird to comfort her. The bird promised that from each of her falling tears a new flower would grow, tinted with the rose of his feathers and the white of her hair, and springing from a root as bitter as her sorrow but as nourishing as her love. The prophecy came true, and her people called the plant spetlem -“bitter”.”

Lewisia rediviva in flower; with many thanks to the provider of the picture.

How the bitteroot came to be collected during the Lewis and Clark expedition(1804/06), how it was named and by whom, and more importantly how profound this little species was intertwined with Indigenous Peoples  lives – I hope you will read about it all in the article provided. It is a great story, especially for a cold, snowy day!

Advice for growing it, and more beautiful pictures, in this thread from SRGC forum: http://www.srgc.net/forum/index.php?topic=15817.0


Let’s indulge in few ‘exotic’ late June flowers today. Roscoea species, regardless if they come with small or larger flowers, always bring a ‘tropical’ look to our cold climate gardens.

They are not difficult to grow from seeds, only require patience and I’m happy that more local customers have taken advantage of the seeds offered. Mature plants can be quite expensive when available and I consider that younger tubers will adapt better when planted in the ground.
I gave advice about planting them in this post: Contractile roots – a journey to the center of the earth?.

The tiny R. tibetica fo. atropurpurea fits better in a rockery nook or a container planting. The plant shown below close to Hepatica acutiloba is the result of a ‘location’ experiment; the Hepatica leaf is good for size scale!.

Clockwise: Roscoea scillifolia fo. atropurpurea (small but striking dark purple flowers), striped Roscoea cautleyoides form, Roscoea cautleyoides ‘Kew Beauty’ (flowers of a delicious creamy color) and the tiny Roscoea tibetica fo. atropurpurea ex. B-15 (seeds offered some years)

Here’s a better look at R. tibetica fo. atropurpurea:

For those who didn’t follow the story from the beginning, please see these links:
Homework for today: Rubus chamaemorus germination – December, 2019

Preliminary results on Rubus chamaemorus germination – update 1 (Jan. 10, 2020)

Lot#2 has been eliminated (the seeds were damaged during the endocarp removal).

Lot#1 – the first signs of germination appeared pretty fast, with the radicle emerging first, in most cases.
A few seeds were also discarded, but almost all the remaining ones showed signs of germination (radicle growth and greening of cotyledons).
The container/and the pot with transplanted germinated seeds have been kept under light at +/- 20C.

The main aim of the experiment was to see if the seeds indeed germinate at warm/room temperature, and they do.
But excising the seeds from the pyrenes is not an easy job and many will get damaged during the process. Especially for large lots of fruits, it is a completely unpractical method.

Rubus chamaemorus pyrenes: hwt x 3 times, placed at warm/light

Another attempt is being made by using a hot water treatment (hwt) on the pyrenes. The hot water treatment gave excellent results last year for replacing the mechanical scarification usually employed for Fabaceae seeds.

Lot#3 was treated with boiling water 3 times, one day after another starting on Jan. 16, and then placed in the same conditions like lot#2. We’ll see if the treatment was enough to produce fissures in the endocarps and allow germination without extracting the seeds.
Update will follow.


Recap:
If Rubus chamaemorus fruits are sowed, they require 270 days of cold/moist stratification in order for the endocarp to broke down and allow the seeds to germinate. Translation: for fruits sowing in late fall, expect some germination in the third spring after sowing.

If you manage to remove the endocarps without damaging the seeds, they will germinate quite fast at warm (room temp.)/light.


Update 3 – regarding germination trials out (2021):

First, because I had a question about it: what went wrong with excising the seeds from within the pyrenes?
The problem was that using a very sharp scalpel, the seeds were damaged while cutting through the pericarp. Microscopic cuts or punctures led to the damage of the seeds and embryos.

Unless one is a surgeon, I don’t see it as a feasible method, even if the few unharmed seeds did try to germinate.

So, in early spring of 2021 I went back to a classical method of scarification used by plant nurseries for this type of ‘seeds’ by using  sulphuric acid. This is not something that can be applied at home and I don’t know if it is much in use in the nurseries nowadays; out of curiosity I had to give it a try.

One lot of seeds was treated with sulphuric acid for 45 min and another one for 1 h.

Rubus chamaemorus pyrenes – H2SO4 treatment in April 2021, kept in Petri dish on moist towel; picture taken Sept. 12/2021

Afterwards, the ‘seeds’ were kept under lights at room temperature, and… nothing happened. Some seeds seem a bit enlarged but obviously the time wasn’t enough for the endocarp to be eroded enough in order to allow water imbibition.
Later on I found one study suggesting a 3h treatment with sulphuric acid; maybe I will try it this coming winter.


Also, another more friendly method, like nicking, was also tried with no success.
Then I left a sample of pyrenes sitting in water since March! I thought that some may give in and imbibe but it didn’t happen.


Rubus chamaemorus pyrenes – after receiving hot water treatment x 3 times in spring 2021, then kept in water (regularly changed); picture taken Sept.12/2021

Conclusion: for home gardeners sowing as usual and patience may provide the best outcome in regards to germination of this species. Repeated cycles of warm/cold/warm/cold are necessary for the endocarp to broke down and allow water imbibition of the seeds and start the germination process.