Although work is still ‘in progress’, most of the species available up to date have been posted on the Seeds List and diligent people have already started their fall shopping.
It is time to advise all interested to do the same; due to the extreme drought in the region, many species will be in limited quantities this year, even those which usually come in bigger quantities. Some species are restricted to 1 pck./order, at least for the beginning of the season.

A second wave will come in late Sept/October. I’m not talking about Covid, we are all tired to hear about it. There are species still in flower or at the end of flowering and for those the seeds will be ripening late.

Keep in mind that mail delivery is slower than usual, although not too bad lately; we have to give Canada Post and all other postal services around the world some credit. Like everyone else, they have had a hard time adjusting to new rules and regulations.

Get excited this fall – grow some plants from seeds and help biodiversity thrive in your garden. Purchase whatever you are interested in and keep the seeds packets handy – sow the cold germinators in late fall and the warm germinators in early spring.
The moist packed seeds, seeds with warm/cold germination pattern and the peony species need to be sown asap.

New to growing from seeds? Have a look first at the Germination page, read a few postings there, take a deep breath, read some more and after that decide what’s good for you.

For all newcomers to this blog/website: Welcome! I hope you enjoy the various writings about plants & germination. Keep in mind that using the Search tab will give you access to everything written on a certain subject.

This is also the start of a series of plant portraits, featuring species from the current SEEDS LIST.

 Polygala paucifolia, aka fringed polygala, gaywings

Fringe polygala is a native species of North America deciduous and mixed forests, with a low growing habit; a perfect plant for a moist/shaded spot in the rockery or at the edge of the woodland garden. If flowers in May, sometimes overlapping with Trillium grandiflorum. The flowers are large, deep pink with wing-like sepals and petals joined at the tip and ended with a frilly crest. Read more, including how to germinate and grow it & plant companions on the product page: Polygala paucifolia. 

A show-stopper when flowering, to say the least! Although a most desirable species, it is extremely hard to catch the seeds at the proper time, like the case with all Polygala species. I am always pleased to be able to offer and share seeds of such species rarely seen in cultivation just because lack of seeds. This year there are more seeds than usual – Enjoy :)

Polygala paucifolia in habitat in May, SW Ontario

Goldenseal (Hydrastis canadensis L – Ranunculaceae) is a woodland species growing only in Southeastern Canada and Eastern US.            

It is known under many other common names: yellow puccoon, eyebalm, eyeroot, Indian paint, wild turmeric, ground raspberry, which can often be traced back to the Native American uses as a medicinal plant. The Cherokee and other Indigenous tribes used the roots of this plant as an antiseptic for inflammations, general tonic, to treat skin problems, and as an eyewash.
Also a golden-yellow dye was produced from the roots (yellow rhizomes), hence the common name ‘Indian dye’.

It was just a matter of time for the European settlers to start using it in a similar fashion. Somehow the popularity of the species grew exponential during early 1990s, and the demand for goldenseal increased tremendously, which of course, lead to the over-harvesting of plants in the wild.

Considered rare and/or endangered, with protection legislation in place forbidding harvesting from the wild, the loss of natural habitat is nowadays adding to the conservation challenges of this species.

Personally I wanted to cultivate it not for medicinal purposes, but as part of the woodland plant community, together with Trilliums, Uvularia, Jeffersonia… and so on.
Goldenseal is presumed to be growing in the some locations in Southern Ontario, but it is elusive and I have never encountered it in the wild.

I am happy to be able to share a few seeds from my garden grown plants (raised from seeds) hoping that more people will offer it a refuge in their woodland gardens. With large maple-like leaves, white flowers and ‘strawberry’ looking fruits, it is a beautiful plant!

Propagation from seeds:

The seeds are hydrophilic and have to be sown right away after being removed from the fruits or moist packed for sowing at a later date.

For best results they have to undergo the natural variation in temperature from our temperate climate: warm (late summer) – slightly warm/cold (fall) – cold (winter). The seedlings will appear somewhere in May, almost at the same time with the adult plants emerging from the ground.
One option is to sow the seeds asap and keep the pots outdoors (cold frame or snow covered in the winter).

For those interested in a more ‘controlled’ germination, I will outline how I grew my plants. For a small lot of seeds maybe it is better to keep a close eye on the process because Hydrastis seeds present a peculiar phenomenon: the embryos start growing in late fall up to the point that the seed coats split to reveal the endosperm. This is due to the embryo growth and can be already noticed in December; they gradually continue to enlarge toward the spring, as seen in the pictures.

I mixed the seeds with slightly moist vermiculite and kept them at room temperature until late fall, then somewhat cooler for a couple of weeks, and then placed them in the fridge to simulate the winter (+/-4C).  The moisture must be checked regularly.

The seeds were sowed in pots after I noticed the first roots starting to emerge (see picture above – late March/April) and the pots placed outdoors in a shaded cold frame (beware the critters, late freeze, heavy rains; a garage is also a good option too since light is not necessary for a while); keep moist, but do not over water (the seeds will rot easily at this stage). The seedlings will appear sometime in May. In the first two years the growth is slow like in all other rhizomatous species and best to grow them in the sowing pot; the first flowers are to be expected in the third year.

Head to the Seeds List, or click here for the direct link to Hydrastis seeds. Only propagation, especially from seeds, truly leads to plant species conservation.                                                                    

*Botanically speaking, Hydrastis is a bit of a controversial genus within the family Ranunculaceae. It was moved to Berberidaceae due to its similarities with Podophyllum and Diphylleia; returned to Ranunculaceae due to its strong resemblance to Glaucidium; placed in its own family – Hydrastaceae, and then finally, returned back to Ranunculaceae.

Its most closely related species is Glaucidium! (which has been awarded its own family in the end). For now Flora of North America places Hydrastis canadensis in the Ranunculaceae.


and Trillium seeds

It is official – the first colorful fruit of the season belongs to Hydrastis canadensis! None of the others already collected can pass as being colorful.

Hydrastis canadensis (Goldenseal) ripen fruit in mid-July, 2020

By the way, seeds of Trillium grandiflorum are in stock, and so are seeds of a light pink form of Sanguinaria canadensis.


Other species benefiting from summer sowing that were recently uploaded in the inventory: Helleborus foetidus and Lilium washingtonianum.


Hepatica seeds offerings

All the available Hepatica seeds are now in stock: Hepatica category. The sold out forms have been archived and can be found using the Search tab.

I am very happy that this year I managed to collect more Hepatica americana seeds; last spring due to a rainy and cold spring there were just few seeds available. Hepatica americana #1, #2, the bicolor form and the ‘Spring Dawn’ are all delightful!
There is also a new H. acutiloba fragrant! Maybe few of the seedlings will inherit this trait.


Following an email from a client regarding the warm period mentioned on the Germination page, I need to make a clarification. It seems that ‘warm’ can be misunderstood. It is a term broadly used for all species which need to be sown in late spring/summer in order to germinate properly.

Those reading with attention on the germination page would have also noticed this: “It has been shown that the embryos will start growing rapidly at the end of summer when the day/night temperatures start to decline.”

So, actually nothing is happening until toward the end of the summer, when with the falling of temperatures the embryos start growing. For all living in the Northern Hemisphere, ‘warm’ simply means: keep the sowing pots outdoors, in a shaded place, and let them follow the natural variations in temperature until winter arrives (keep the pots out of heavy rains, this year seems to be crazy; a shaded spot along the house under eaves, under a patio table, underneath a large shrub…..).

The ‘warm’ period would constitute a problem only for those in the Southern Hemisphere, who currently experience winter.

Advice for those thinking of growing Hepatica for the first time:
Please consider starting with H. acutiloba- pastel mix or any other H. acutiloba.

They usually germinate in the first spring (if instructions are followed), the seedlings are vigorous and
prove to be quite adaptable, including in the garden (H. acutiloba pastel mix seedlings in the featured image).

Hepatica acutiloba ‘Purple Star’ seedlings of last year

Hepatica americana it is a bit more finicky, and some seeds will only germinate in the second year after sowing, regardless that they are moist packed and sown right away.

Please review the Checklist for growing Hepatica from seeds, before purchasing seeds with unrealistic expectations (they may not germinate in the first spring after sowing and it will take 3-4 years until producing the first flower).

While waiting for Hepatica seeds to drop into the catching bags, ;) we can admire two dwarf Polygala species. I’m a big fan of Polygalas.

From the garden, flowering for the first time: Polygala amarella, the dwarf milkwort. This is a European species growing on limestone grasslands, slopes and rock ledges, up to subalpine level.

Polygala amarella, cultivated (grown from seeds wild coll. Carpathian Mts)

From our woods: Polygala paucifolia, the gaywings. I showed it many times but it flashes for attention, flowering more or less at the same time with Trillum grandiflorum. It is growing on deciduous and mixed forests, in part-shaded, slightly moist locations.

Polygala paucifolia in wild habitat

Polygala species are not difficult to grow from seeds, it is just that the seeds are very hard to “catch” and thus always in short supply; then the seedlings are best grown in the community pot for 2 years. Flowering can start in the third year and is very rewarding. Polygala vulgaris and P. major are also in line to flower this summer — it doesn’t get any better!

Timeline for Hepatica seeds: collecting maybe in the first week of June.
The offerings are taking shape in the Seeds Shop – check out the Hepatica category; final price/seeds per pck. will be established after collecting.


As soon as the rains allow, small bags will be placed to catch the Hepatica seeds; for both H. americana and H. acutiloba. I mentioned before that catching the seeds is not an easy task. This year the flowering show was partially missed and we cannot be sure about the seeds until later. I will show a few H. americana plants that I have my eyes on:

Hepatica americana #1
I gave it this ‘name’ a few years ago and in a way it remains my favorite. It is a large specimen, reliable flowering (seeds germinating in the first spring) with violet/blue flowers with a narrow white edging.

H. americana ‘Spring Dawn’
An exciting find with larger than usual flowers with multipetal tendency and also gorgeous foliage. It is a mesmerizing form of H. americana but I don’t know yet if it would come true from seeds.

Few forms with pure, white flowers are also marked for collecting.


A bicolor specimen shown below it would be a first time offering. As well, seeds from a small isolated group of plants with white flowers brushed with pink, they should come true from seeds – a seedling in the featured picture.

Hepatica americana bicolor

Maybe also few seeds from a white form and white/lavender forms with multipetal tendency.

Available seeds will be posted in the shop (in 2-3 few weeks) and announcement will be made here and on FB page (those interested please subscribe to one of them).
Last year extremely cold and rainy spring made it for a disastrous seeds setting so I really hope this season will be better. Fingers crossed!

The checklist posted for H. acutiloba also applies for growing Hepatica americana from seeds.


What else better on a cold Friday than to look at nice Hepatica acutiloba pictures? This spring the flowering show was partially missed, but there are plenty of pictures from previous years. What forms will be available on the shop is hard to say until the seeds start to form. We can only hope that most will have a good seeds set.

Again, collecting Hepatica seeds is not an easy task. Especially in the wild it requires repeated trips and bagging (this must also be done in the garden) in order to catch the rapidly dispersing seeds.

I would very much like everyone to be successful in growing these beautiful plants. Truth is though, that not everyone has enough patience (and/or skills) to grow from seeds species that require 3+ years to reach a modest flowering stage. So, I put together a checklist.
Checklist for growing Hepatica from seeds; you have to mark OK for all in order to consider growing Hepatica from seeds.
– purchase the seeds preferably as soon as they become available.
– sow the seeds as soon as they arrive, keep the pots under natural conditions in a part-shaded location and water as necessary.
– be prepared to wait until the second spring for germination; i.e. take care one more year of “empty looking” pots.
– transplant and take care of small seedlings.
– wait 2-3 more years to see the first flowers.
– all of the above, while continuing to take care of the plants/pots (they can be also ‘planted’ in the ground/large container)
– all in all, 3-4 years are necessary until able to enjoy the first flowers.

More details on Hepatica page, also Transplanting and caring for Hepatica seedlings, plus see the linked posts below.
Again, there will be an announcement with more details when seeds become available (late May-early June).


Today, I continue to record the cultivation of goldenseal, Hydrastis canadensis, in my garden. A reminder that this is an endangered species in its wild habitat! Last year one plant even produced a small fruit and what to do with few seeds? I sowed them of course; now they are starting to germinate, on the same time the adult plants are emerging from the ground.

The beautiful sight of Hydrastis canadensis emerging from the ground yesterday, May 4th 2020

Especially when growing native species it is important to work in sync with nature in your garden. This is also a good occasion to let you know that there is a wealth of good gardening eBooks on sale until May 21.

Those interested, please see the link below for the Earth Day Special on ALL gardening eBooks!
https://www.gardenfundamentals.com/special-on-hundreds-of-gardening-ebooks/


A brief garden ‘woodland’ walk to see various species that were basking under the sun a couple of days ago. Again, trying to use locations in the garden that reproduce the native habitat is the key to happiness.
For most parts this means deciduous woods which allow plenty of sun in early to mid -spring and again in the fall. Combined deciduous/coniferous woods allow less light and can also be dryer (except on bottom lands and river valleys).

Of course that some species are more adaptable than others and having seedlings you can try them in various locations to see how they react.
Asarum canadense, the wild ginger, is one of the most easy going species that can be used as a groundcover. I caught it in the act of flowering in a sunny position, while in more shaded area is still in bud. The second picture shows the success I had establishing young plants grown from seeds on a dry slope (also shoots of Maianthemum stellatum showing up).


Anemonella thalictroides  (syn. Thalictrum thalictroides), rue anemone, is usually found on slightly moist locations. It is very easy to grow from fresh or moist packed seeds – pictured here are 3 years old flowering plants.

Another easy going, spreading by self-sowing is Hydrophyllum virginianum, Virginia waterleaf. It can even grow close to old tree trunks (hint for dry shade resistance!). A most loved species by the bees and bumblebees, so a few plants are a must (young seedlings can be easily removed if not desired).

The spring beauty, Claytonia virginica always loves to be close to the trees. A few left in my garden (squirrels love to dig the corms) and a nice patch flowering in the woodlands last year. The woods are still out of reach and seed collecting remains a question mark for now.

 I will finish for today with these Prosartes lanuginosa seedlings, which are grown in a pot buried in the ground. I have shown this easy method to grow all woodland species from seeds a few times and I repeat it again for all those who recently purchased Caulophyllum thalictroides seeds ;)

Prosartes lanuginosa seedlings, yellow mandarin

Read more about easily growing woodland species from seeds: We got the moist packed seeds – now what?
Purple beasties – Caulophyllum

Until next…


In the last few days I’ve been ‘circling around’ a garden bed which due to the natural land configuration remains temporarily wet, with gradients of wetness and sun to part/sun exposure.
With the warming up I will start adding more species to this area. So let’s see a few native species suitable for such a location. When growing native species (and not only) it is very important to choose a garden spot that best imitates their native habitat.

Iris versicolor (Northern blue flag) is more than happy in such a location; the wetter, the better. Also, a small clump of Iris hookeri will be moved closer hoping for a better flowering. I plan to also try in this location a division of our beautiful dwarf lake Iris, Iris lacustris, which is currently in a drier spot.

Sisyrinchium mucronatum, the slender blue–eyed grass, it is another resident; easy to grow and its fine texture combines beautifully with the Iris leaves.
Parnassia glauca (Marsh grass of Parnassus); any slightly moist place shouldn’t be without a Parnassia! This species gets quite robust after a few years and may even reseed in place. And what a wet area would be without water avens, Geum rivale?

A bunch of Zigadenus elegans (Mountain death camass) seedlings planted last fall are just coming up. Also, speaking about seedlings, a pot of Lilium philadelphicum (wood lily) awaits the spring planting rush to begin.
One can find this native Lilium in various habitats, including (moist) woodland edges, but I’ve also seen beautiful specimens growing in wet ditches and I will try it this way.

There are many more other native species that I will gradually add: Castilleja coccinea and Lobelia cardinalis (seeds to be sown ‘in situ’ by fall). Asclepias incarnata is a must, as are Lobelia spicata and Chelone obliqua if the space allows (to mention just a few…).
Grasses and sedges speaking, there is a nice Deschampsia cespitosa (tuft hair grass) and Carex grayi; I would definitely like to grow more grasses.

Take notes for fall sowing ;) and fingers crossed seeds will be collected.


The first Hepatica started to flower a while ago bringing high hopes of an early spring. Then, cold, bitterly temperatures returned in Ontario and everything has come to a halt. Taking pictures it is always a good way to record the start of growth for various species in the garden and in the wild. It is not only about the pretty flowers ;)

But records apart, I admit it is mostly about the joy seeing the first new shoots and leaves appearing from the ground. After our cold and long winters, the feelings of anticipation and expectation that an early spring brings can hardly be replaced by anything else.

Leaving Hepatica and Caulophyllum aside, I will show early starting NA native species from the garden (most were grown from seeds). The first picture in the gallery is from the garden; second one from the garden or woodland later in the spring/summer (hover for names).

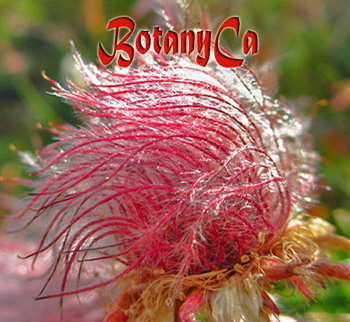
First, the evergreen Geum triflorum (Prairie smoke). It retains a decent foliage all winter long and at the first spring signs will grow new foliage and start flowering. It is quite amazing to have these healthy looking, large clumps in April!

Allium tricoccum (Wild leeks, ramps) foliage; mine are young and may not flower this year.

Podophyllum peltatum (Mayapple) little umbrellas, as well as the first Sanguinaria canadensis(Bloodroot).

Stylophorum diphyllum (Woodland poppy) emerges with the flower buds, well prepared for an early flowering in May.

In the feature image: our beloved Primula mistassinica; this species retains a small rosette over the winter and the flowering stems start growing in early spring.

The native species April-fest will continue soon after I prepare more pictures.
*Note: links are provided for those interested to read more about the species, but of course seeds are not available for many at this time.


Young Caulosaurus :)

While talking Caulophyllum, here’s something I didn’t get around to show in late September last year: a bunch of Caulophyllum (most probably giganteum) 2 years old seedlings I dug out to replant.


As mentioned before, the large seeds of Caulophyllum, which require 2 years for germination, can be easily sowed ‘in situ’ (in the garden, woodland floor) in a shaded area, preferably close to another perennial/shrub. During dry spells some watering is required; otherwise there is nothing else to do.
When ready, they will germinate. If sown well-spaced there is no need to transplant them.

One early spring pleasure is to see the purple shoots erupting from the woodland floor. I still hope to be able to do it. Until then, the little ones from the garden are doing a good job.

 *Attention to the clients who have purchased seeds 4 years ago as C. thalictroides: it is very probable you actually have C. giganteum.

Caulophyllum giganteum seedlings: all seen here were sowed/ growing too close together; it was a good time to dig them up and replant them properly in September


We talked about seeds and  Hepatica germination – we need to have patience. Not only the seeds may germinate in the second year after sowing even if they were kept moist, also the seedlings, in most cases, are not very fast to develop.  Some will remain at the cotyledon leaves stage in the first season, others will grow one true leaf. In either case, they can be quite tiny and intimidating.

Let’s see about transplanting.

When to transplant?
One feature of Hepatica is that they put up a good growth in the spring through summer (roots, leaves, seeds, future flower buds) and then they take a ‘break’ until next year. For this reason I like to transplant in early spring or if not, in the fall; at least, the young plants will start the next season already well prepared.

What potting mix to use?
There are various recipes recommended by Hepatica growers. Unfortunately, most are not easy to reproduce exactly here. I’ve tried to mix various products available in the last years and some were better than others. What I want in the end is to have an easy to reproduce recipe using soil brands anyone can buy (in Canada).

I came up with this mix, which I think is pretty good: mix all ingredients in equal parts (1:1:1)

Perlite
Pro-mix potting soil
All-purpose potting mix:  Fafard brand is a good one. Unfortunately this sector of the landscape industry is non-regulated and most brands don’t specify the contents of the potting mix, plus, in almost in all cases they contain too much peat.

As a rule, as long as good drainage is ensured all should be well, so other combinations could be tried.

 Pots

Taller pots are preferable. You can basically use any type/size of pot proportionally sized in regards to the seedlings size and transplant 1-2 seedling/pot.
To avoid handling many individual small pots one can also use a rectangular planter instead. Another option is a compact-tray with a good height.

Transplanting
Remove the seedlings from the sowing pot and carefully separate them. As seen in the pictures, Hepatica seedlings have a fine root system.

Transfer the seedlings in a new pot, add mix and take care to press only around the roots. The watering will settle down the mix well (add more mix if necessary).

Clockwise: Hepatica acutiloba pastel mix – seedlings removed from the pot; Hepatica japonica transplanted, flowering seedling, H. acutiloba pastel mix seedlings showing the roots; compact-tray with H. nobilis and H. acutiloba seedlings

Location: same like for adult plants, keep the pots/trays in a location with plenty of sun in the spring and shade starting summer. If necessary cover them with a plastic mesh. Water when necessarily (deep watering and let dry between) if the pots are not exposed to rain; a light fertilizer during the spring growth is beneficial.

Planting in the ground:
Usually in the third year the seedlings  can be planted in the ground.
To continue growing in pots transplant again to a larger size pot/container. Hepatica species are fitted for container growing if you have a small garden, or unsuitable soil conditions. You can easily provide sun in the spring and shade starting summer by moving the container in different spots.

Most often also the first flowers will appear in the third year to reward your efforts!

Various forms of Hepatica japonica 3 years-old plants

*I referred in general to Hepatica because in the end there is no difference between various species when it comes to germinating the seeds and transplanting (H. americana, H. acutiloba, H. nobilis, H. japonica and H. henryi).

We discussed last year about the hot water treatment, a very easy to apply germination method which can successfully replace the use of scarification for the Fabaceae species. However, it is hard to say if it would be effective for all species and if all species will germinate at room temperature afterwards.

In addition, I will provide answers to few common questions and plates with seeds images for all species/genera I personally tried/try with this method.

How much the seeds should/will swell after a hot water treatment?
It depends on the species, the size and shapes of the seeds varies greatly, but usually the seeds can increase in size 2-3 times than the original size. Sometimes you may notice a ‘dramatic’ change in the seeds aspect/size (ex. Lupinus breweri).

Is it possible that no seeds will swell after 1 treatment?
Yes, it can happen, repeat again (for ex. Senna hebecarpa, Oxytropis, Trifolium seeds are slow to react).

How much time should the seeds remain in water?
Usually the next day you will see if the seeds have swollen (and how many), but to be sure you can keep them in the water for 2-3 more days (change the water daily).
In extreme case, seeds may even start to germinate in water after a while! (Hedysarum, Thermopsis).

Will all the seeds swell at once?
No, in the majority of cases after the first treatment only a few seeds will swell. Sow the swollen seeds after each treatment and repeat for the others (2-3+ times).

How soon will the seeds germinate?
It varies greatly with the species, some will start to germinate in few days, others will take a longer time (for ex. various Baptisia were slow to germinate).

Fabaceae – Hot water treatment 2019; notice the increase in size and the differences between species; all were germinated at room temp. afterwards

Current trials:

Fabaceae – Hot water treatment 2020; seeds aspect after 2 treatments. For each species notice seeds still of normal size and also swollen seeds.


With the first snowdrops in bloom spring is undeniably in the air. It is an exciting time with renewed hope and we all think about new plants to add in the garden.
Some people plan well ahead about what to grow from seeds, but others maybe purchase seeds and plants on the impulse of the moment. Then, there are always seeds arriving late from seeds exchanges.

Because all the latest orders had in common a combination of species, warm and cold germinators, I feel obliged to repeat how to proceed at this time in order to obtain the best results with minimum effort. Good timing for sowing is important!
If you don’t need advice, jump to the end of the post to see a few ‘green things’ from the garden :) All grown from seeds, except the snowdrops.

For those in the Northern Hemisphere

Species that are indicated to germinate at warm (15-20C) can be sown right away if you use indoor lighting for growing seedlings or later (April/early May) if you intend to keep the pots outdoor.

*Species indicated to have double dormancies and require first a slightly warm cycle, followed by a cold one in order to germinate (Hydrophyllum, Euonymus, Actaea…) – can be sowed later, in the summer. Most Peonies are also in this category; sowing in late June/July gives them more than enough time to develop the roots until late fall. Same goes for two stage warm germinating Lilium species (L. michiganense, L. monadelphum…).

Various Fabaceae can be treated with the hot water treatment and considered warm germinators. Last year tests gave excellent results (Hedysarum, Oxytropis, Astragalus, Baptisia, Thermopsis, Lupinus*).

Species that can be sowed ‘in situ’ (Papaver, Lobelia, some Viola spp.…) – wait until April/early May and cast the seeds in place, incorporating lightly (most such seeds are fine and need light to germinate), keep the area moist and if there are too many critters around consider placing a mesh on top of the sowing location.

Species indicated as: sow in the fall or cold/moist stratification – I advise you to keep the seeds packets in the fridge until fall, and then proceed with sowing (in pots or ‘in situ’).

You can of course try to provide cold/moist stratification in the fridge, but don’t expect the same good results. Also, you may end up with seeds germinating in June/July and young seedlings by late fall withstanding poorly the winter cold.

 Moist packed seeds: not sold at this time of the year, with the exception of two years germinators (Caulophyllum, Medeola), when stock supply and temperatures allow.

Cypripedium: if not using ‘in vitro’ equipment, as discussed already, there is a slight chance that by incorporating the seeds in the garden close to where other orchids thrive, to be successful. Note the ‘slight chance’.

Those in the Southern Hemisphere: reverse the timings, sow the cold germinators, keep the warm ones in the fridge.

Do you wonder about your Fritillaria seeds/seedlings/young bulbs? Wonder no more.

With many thanks to a very impatient grower, we can have a look at Fritillaria recurva little bulbs. Also, at my germinating seeds of Fritillaria atropurpurea.

The one-year old bulbs were found at the bottom of the pot. Fritillaria seeds are adapted to wind dispersal (like many Liliaceae actually) and should be sown superficial; then, the growing seedlings will adjust the bulbs to their desired, proper depth.

Fritillaria recurva: seeds to one-year old bulbs

My stratified seeds of Fritillaria atropupurea on Jan. 1st are starting to germinate (1,5 months of cold/moist stratification). And, by the look of the embryos, Fritillaria affinis will follow shortly.

As I already mentioned,  I’m not much of a Frits grower. I’ve grown a couple of species (non-flowering yet) and only this season I have sown more. By the way it goes, it is best to grow the bulbs in the same pot for two years; if necessary transplant the whole content of the sowing pot in a bigger one, keeping the bulbs at the same depth.

Fritillaria atropurpurea germinating seeds after 1,5 months cold/moist stratification (fridge)

If you have pictures related with the Frits species seeds purchased, please don’t hesitate to share!